How to root your HTC Desire and install Android 2.3 (Gingerbread)

Step-by-step guide

There are various reasons to do this, including:

  • Needing root to run certain apps. This includes taking backups, removing unwanted pre-installed apps, and installing a fix for the tiny (140 MB) internal storage on the HTC Desire.
  • Wanting an upgrade to Android 2.3 or higher. This is not available officially.

Isn’t this explained elsewhere online? Yes, but many guides are out-of-date or include unhelpful advice. I wasn’t able to find everything I needed in one place.

This post is 80% there: http://androidforums.com/desire-all-things-root/439627-guide-revolutionary-s-off-rooting.html

This will wipe your phone including apps and data.

Preparation

As well as an HTC Desire you need a Windows PC connected to the Internet and a micro-USB cable for your phone.

The custom ROM process is a bit quicker if you have a USB reader for your micro SD card.

Drivers

On your PC:

  • Download and install HTC Sync. Then uninstall the HTC Sync software itself, leaving the HTC drivers in place.
  • Download and install the HTC fastboot drivers mentioned on the Revolutionary documentation.

Is it necessary to install the Android SDK for this process – using adb shell? I don’t think so. Described on this post.

On your phone:

  • Enable USB debugging.
  • Enable installing non-Market apps.

Root and custom recovery

This is a two step process: we use Revolutionary to gain S-OFF on the phone, then flashing a root zip file which gains you root. Revolutionary does not get you root by itself.

HBOOT version / erase size of 20,000 or 40,000. As we’re using Revolutionary and ClockWorkMod (CWM) does this apply? I think not.

From boot screen:

Check if PVT version is PVT4. If so check erase size.

Install Terminal Emulator from Market, then

cat /proc/mtd

Check if 20000 or 40000. If 20000 or not PVT4, we’ll use ClockWorkMod.

Check HBOOT version, this must be lower than 1.06.

On your PC:

  • Turn off your anti-virus software temporarily.
  • Download Revolutionary from http://revolutionary.io and the custom root zip file mentioned on their documentation page.
  • Connect the phone. Put the custom root zip file on the SD card.
  • Start Revolutionary. It will guide you through the process.
  • You need to get a beta key for Revolutionary – the program gives the details about your phone to generate one on the Revolutionary site.
  • The phone will restart a few times and Revolutionary will update you on progress. It’s automatic, but keep an eye on it.
  • As a final step Revolutionary asks if you want to install a custom recovery – CWM. Say ‘yes’ to this.

You now have S-OFF on the phone.

On the phone:

  • Switch off the phone, and boot into HBOOT by holding ‘volume down’ and pressing the power button.
  • The boot screen should say -REVOLUTIONARY- at the top and mention S-OFF in the next line.
  • Choose Recovery from the menu.
  • Select ‘Install zip from sdcard’ then ‘Choose zip from sdcard’.
  • Choose your root zip file, should be named Superuser-3.0.7-efgh-signed.zip.
  • Power off the phone from the CWM menu.

You now have an HTC desire with root and a custom recovery.

Custom ROM

We will use CWM to partition the SD card then install a custom ROM.

There are some dire warnings online about not partitioning an SD card with CWM, these apply to old versions of CWM and can be ignored with the current version.

This process will wipe the SD card. Copy the contents of it onto your computer first if you want to keep them.

Partition the SD card

Goal is to provide two partitions on your phone:

  • An ext4-formatted partition of 1 or 2 GB on your SD card that the phone will use as internal storage.
  • The rest of the card as a fat32-formatted partition the phone will use as regular SD card storage.

The only complication here is the ext4 partition must come second on the card, the fat32 partition must come first. CWM will handle this for us.

On the phone:

  • Boot into HBOOT by powering off and holding ‘volume down’ and the power button.
  • Go into Recovery → Advanced → Partition SD card.
  • Set the sd-ext partition to be 1 GB.
  • You don’t need a swap partition but setting one of 32 MB will not hurt anything.
  • The partitioning and formatting will take a while. Leave it be.
  • When this is done power off the phone

Installing a custom ROM

Take out the SD card and connect to your Windows PC.

Download your custom ROM of choice. There are many available for the Desire so it depends on what features you want.

I am using the SuperNova ROM which is very good. It provides Gingerbread and HTC Sense and a fairly ‘stock’ experience. Importantly, The ROM has a stable Data2SD installed that provides ample internal storage using your SD card.

Download the latest SuperNova and put it on your SD card. SuperNova instructions are here.

Quick version:

  • Shut down your phone and reboot to HBOOT.

Select Recovery, then:

  • Wipe data/factory reset
  • Install zip from sdcard → choose zip from sdcard → pick the SuperNova file.

Question: is it required to wipe cache and/or dalvik cache? Think it doesn’t hurt at the first install of SuperNova but should never be done when upgrading.

SuperNova is a big file so this process takes a while. It provides updates as it goes. Once it’s finished power off.

At first boot:

  • Allow the phone to boot, then answer all the questions asked except skip the Google account setup. Check About → Software shows the build as SuperNova.
  • Don’t restore data or apps yet. Reboot the phone.
  • At this point Data2SD runs during boot. When the phone has finished booting up, check the internal storage – it should be 900+ MB.

New Radio

Not the Bikini Kill song. The radio is software on the phone that allows you to make phone calls and use mobile Internet.

There seem to be incompatibilities between different Android releases, different custom ROMs, and different radio versions.

Radios are available from Mo Firouz’s site.

Best approach is to leave your radio alone and check if everything works with your new ROM.

  • If it does not, install the most recent radio release. SuperNova recommend you use this – version 5.17.05.23.
  • If this does not work then downgrade to version 5.09.05.30 recommended by Mo Firouz. This worked for me on Gingerbread when my current radio and the newest radio didn’t work.

Flashing the radio

This is complex. The radio as you download it cannot be loaded directly using CWM as they are only distributed in an old and incompatible format. Ignore the steps on the download page above.

You can flash the radio using fastboot. This is a hassle – there must be a better way, surely?

Guide to ADB and Fastboot for Windows.

On the PC:

  • First install the Android SDK. This will take a while as the downloads are large files.
  • Download and install the HTC fastboot drivers mentioned in the Revolutionary documentation.
  • Download your radio file and extract the radio.img file from it.
  • Reboot to HBOOT then select Fastboot from the menu.
  • Connect the phone using USB. Your phone screen should update to say ‘FASTBOOT USB’.
  • At this point you can issue commands using the ADB shell on your Windows computer.
  • Open a shell in Windows using cmd.exe. Navigate to the folder containing your radio.img file.
  • Note: online guides mention setting the system PATH variable. Don’t worry about this, you can just run the fastboot program directly.
  • Find fastboot.exe – it will be somewhere in the Android SDK folder. On my 64-bit Windows 7 machine, it’s:
c:\Program Files (x86)\Android\android-sdk\platform-tools\fastboot.exe
  • Flash the radio using this fastboot command:
c:\Program Files (x86)\Android\android-sdk\platform-tools\fastboot.exe flash radio radio.img
  • Finally reboot the phone:
c:\Program Files (x86)\Android\android-sdk\platform-tools\fastboot.exe reboot

Photo credit

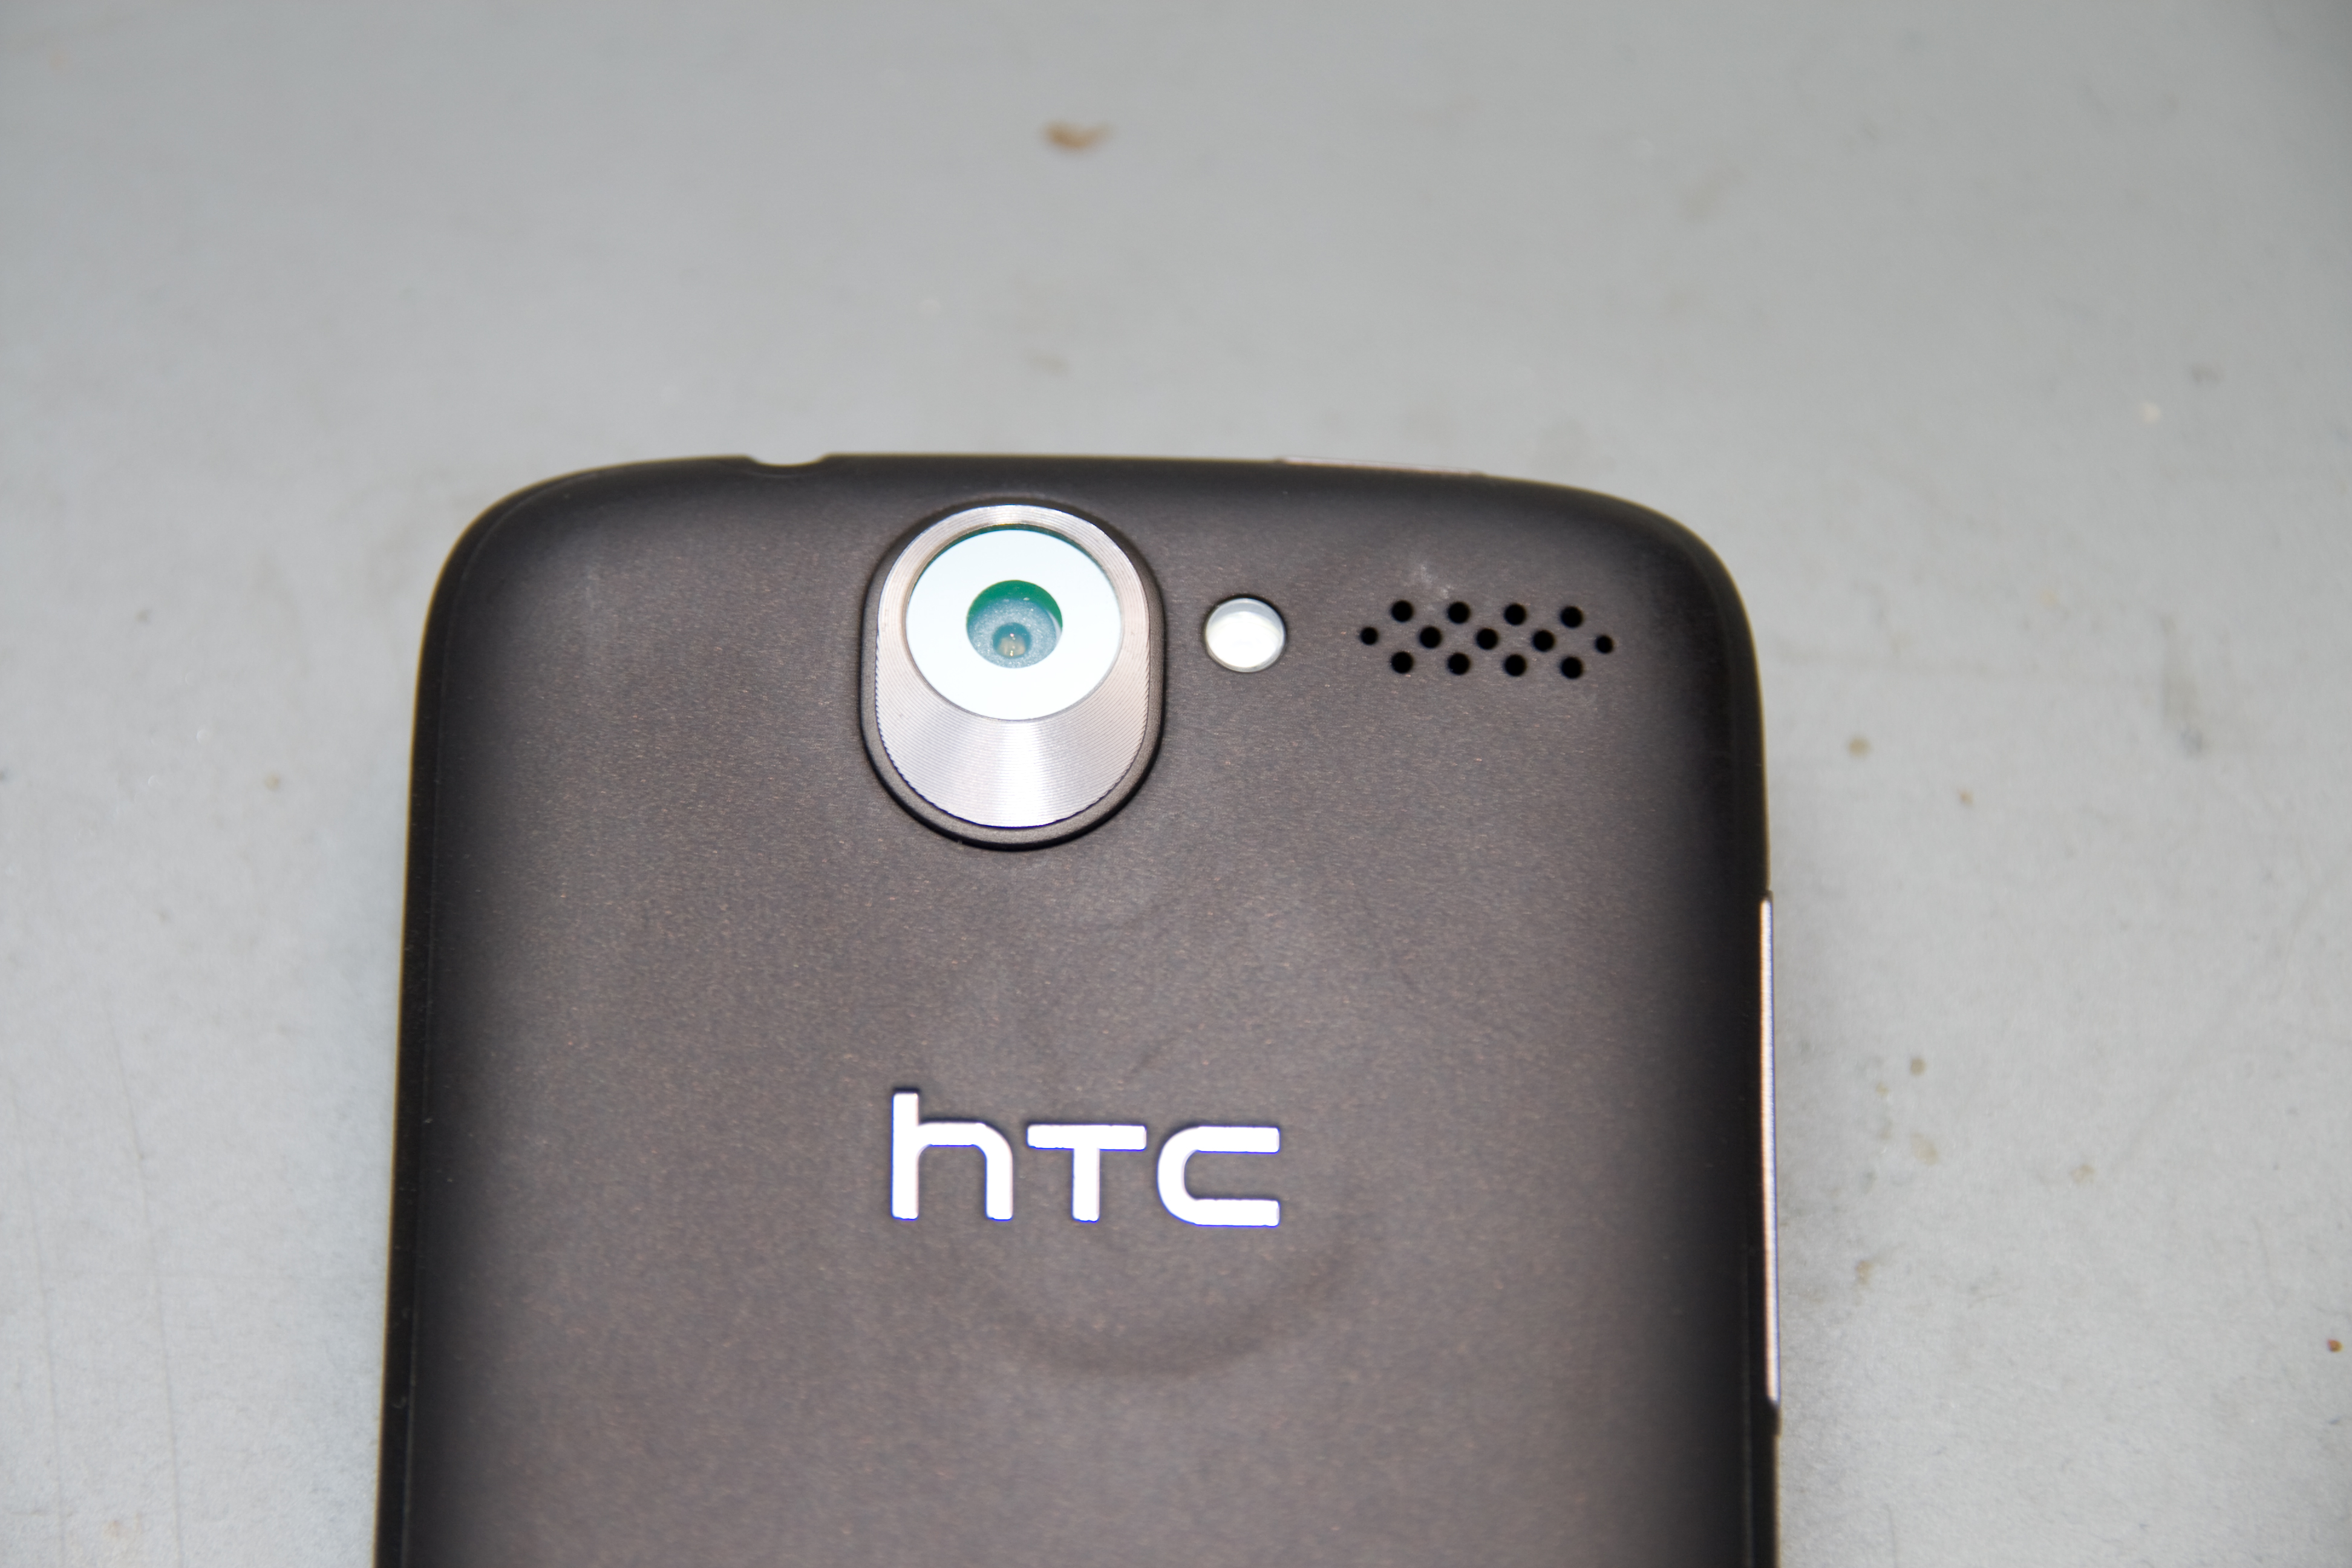
HTC Desire‘ by Flickr user Matthias Penke, license CC BY-NC-ND.
How we added WebBridge / Pathfinder Pro links to our Encore catalogue

When we launched our new catalogue, Encore from Innovative Interfaces Inc., in June 2011 among the first problems identified by staff and library members was that it did not have a way to request journals from our closed stores (we call this the Stack Service which includes our tower and an offsite store in Egham, Surrey).

This missing functionality between the old and new catalogue was a major barrier to buy-in. Not having it meant staff had to explain three parallel systems for requesting just one type of material from the store. Our readers want to request store material online quickly and efficiently, not have to deal with navigating between two different catalogues.

A new release of the Encore catalogue software has enabled us to rectify this and in this post I’ll explain how. The third request system was paper forms, in case you’re wondering…

Link from the Encore record to request a store journal, based on Pathfinder Pro data.

Requesting journals

Historical note: Pathfinder Pro used to be part of Innovative’s WebBridge product, which included both an OpenURL link resolver for linking in, and software for presenting context-sensitive links on your record display. Systems librarians at Innovative sites often refer to both products as “WebBridge”.

Requesting journals from a closed store is problematic for an Innovative library if you are cataloguing journals in a normal way – using a holdings or checkin record to detail what you have, rather than itemising each individual journal volume on its own item record.

In our old WebPAC catalogue I had devised a way of using Pathfinder Pro to link out to a Web form that would send some bibliographic data to pre-populate a form. It’s easy to link out to a form from the record (put a link in the MARC 856 for a quick solution) but reusing the record metadata itself helps readers to not introduce errors.

In my opinion Pathfinder Pro is a good product – the tests you can apply are quite powerful including matching parts of your record based on regular expressions and the like.

The basic principle to enable this linking is:

  1. Check to see if the holdings record is in a store location. Egoist : an individualist review is coded ‘upr’, for example, and a data test in Pathfinder Pro is used see if the holdings record location field equals ‘upr’.
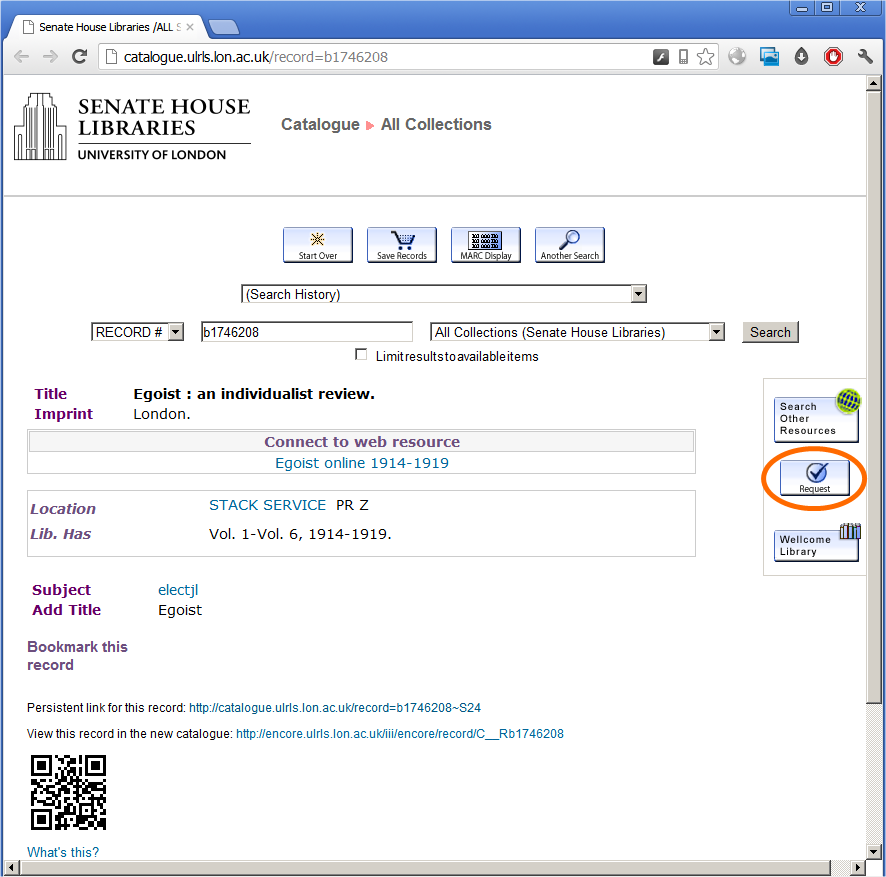
  2. If the record is a store location, build a link based on selecting the journal title, classmark, and the system record number from the bibliographic record. What is actually rendered on the page is a link using the same icon as we use for other types of online requesting:
Link from the WebPAC record to request a store journal, using Pathfinder Pro (circles in orange).

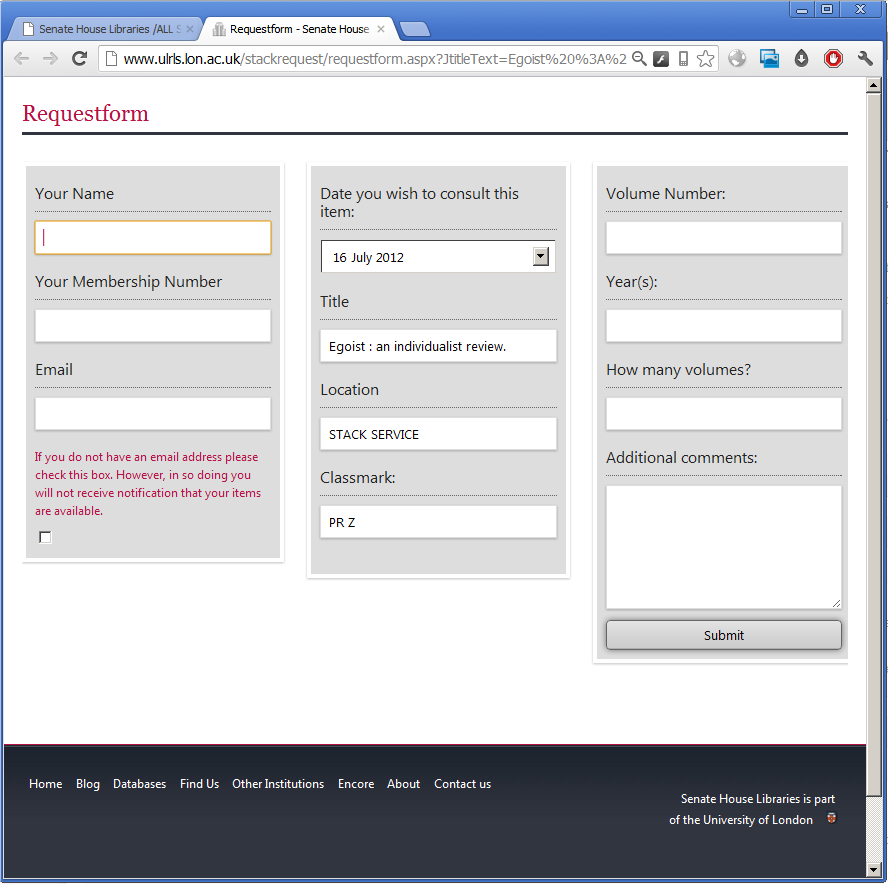
This generates a link to our online request form:

http://www.ulrls.lon.ac.uk/stackrequest/requestform.aspx?JtitleText=Egoist%20%3A%20an%20individualist%20review.&JlocationText=STACK%20SERVICE&JclassmarkText=PR%20Z&JbibText=b1746208a

Which leads to a neatly pre-populated form:

The problem with Encore

The thing that prevents this working in the new catalogue is Encore lacks the Pathfinder Pro “Bib Table” which allows you to place links on the record display itself. In the screenshot above the Bib Table is the space on the record that contains three buttons, including the store request button circled in orange.

This is a problem as many Innovative sites have built services around this feature of Pathfinder Pro that include placing a link prominently on the bibliographic record.

Towards a solution for Encore

The latest Encore release 4.2 allows you to customise the Encore record display by including your own JavaScript. My presentation on this from the European Innovative Users Group conference 2012 with further examples is available:

I decided there simply had to be a way to insert a link to the store request form into the page using JavaScript…

  • Our first thought was using JavaScript to check if the record is in the store, then building a link to the request from by plucking bits of metadata from the page. This was a non-starter as the structure of the rendered Encore page is not semantically sound enough to work with in this way.
  • Second thought was to use an Ajax call to scrape the record display of the classic WebPAC which would be easier to work with. This isn’t possible as Encore and the WebPAC run on different Web servers so you run into the same origin policy. And no, you can’t set up a proxy server on your Encore server to work around it.
  • Third thought was using a Web application with a dedicated screen-scraping library that that could pull the metadata from the classic WebPAC or Encore. We’d link to this from the Encore record display and allow it to direct the reader’s browser to the populated request form. This is almost what we implemented. Read on…

How to do it

Building a link out from the Encore catalogue is simple. The JavaScript for the Encore record is available as a Pastebin for easier reading.

What this will do:

  1. Get the system record number. The simplest way I’ve found to do this from the page itself is use the document.URL which contains the record number.
  2. Check to see if a div exists with ID toggleAnyComponent. Not that you’d know it from the name, but this div is rendered only if there is an attached holdings / checkin record which means we’re dealing with a journal record.
  3. If if exists, check to see if the div matches a regular expression for the string “STACK SERVICE”.
  4. If it does match, create a link out to our Web application and append it to the existing customTop div.

This link out appears in this form:

http://www.ulrls.lon.ac.uk/stackrequest/parse.aspx?record=1746208

1746208 is the system record number for Egoist, minus the leading ‘b’ and trailing check digit.

Web application for screen-scraping

The real work is carried out using a Web application written in ASP.NET by my team member Steven Baker. Steve used the Html Agility Pack which is a library for .NET ideal for scraping Web pages. Of course, you can use your favourite language to accomplish the same thing.

Scraping from the Encore or WebPAC record display is a complicated business and how our library has named our various locations and classmarks was not helping.

So instead of scraping the page directly and including lots of different tests to deal with the various oddities found in the markup, it’s much simpler to scrape the WebPAC record display and pick out the div containing the link rendered by Pathfinder Pro.

This link already has the metadata required for the store request form so it’s then just a matter of using this URL to send the Web browser on their way to the request form.

The first step is to load the classic WebPAC page using Html Agility Pack. The link from Encore provides the system record number to generate a link to the WebPAC screen in this form:

http://catalogue.ulrls.lon.ac.uk/record=b1746208

The Pathfinder Pro wblinkdisplay div from the classic WebPAC looks like this for the example of Egoist : an individualist review:

<div class="wblinkdisplay">
<form name="from_stack_service159_form">
<a href="" onClick="javascript:loadInNewWindow('/webbridge~S24*eng/showresource?resurl=http%3A%2F%2Fwww.ulrls.lon.ac.uk%2Fstackrequest%2Frequestform.aspx%3FJtitleText%3DEgoist%2B%253A%2Ban%2Bindividualist%2Breview.%26JlocationText%3DSTACK%2520SERVICE%26JclassmarkText%3DPR%2BZ%26JbibText%3Db1746208a&linkid=0&noframe=1');return false;"><img src="/webbridge/image/request.gif" border="0"></img></a>
</form>
</div>

You can see the URL Pathfinder Pro normally redirects the Web brower to. The next steps are:

  • Select the div with class wblinkdisplay.
  • Cut out the URL based on using “resurl=” and “‘)” at the start and end of the URL to get the indexes needed.
  • URL-decode the resulting string.
  • Redirect the Web browser to that URL.

In live use, this is so fast that the end user doesn’t realise anything is happening in between clicking the “Request from Store” button in Encore and getting to the request form itself.

Comments on this approach

There are several advantages to handling Pathfinder Pro and Encore integration this way:

  • The work to pick out metadata from the record has already been done in Pathfinder Pro and doesn’t need re-implementing.
  • This will be easy to extend to other store journals, or if journals move from open access shelves to the store. We only need set up a new location in Pathfinder Pro and it’s reflected in Encore as well. We’d have to do this anyway to enable online requests in the classic WebPAC.
  • This approach isn’t specific to journals and could be used to put any links generated by Pathfinder Pro into Encore.

However, this isn’t a complete solution as it doesn’t just give you the Pathfinder Pro Bib Table in Encore. This is what we would really like and what we have asked our software supplier for. That said, if you can pick something unique out of the Encore record to test for then you can link out from Encore in a way that replicates the behaviour of the linking in classic WebPAC with Pathfinder Pro.

Please do contact me with any questions or your thoughts, or leave a comment below.

The Mnemosyne-Atlas: adding Pinterest to the library catalogue.

Why pinterest?

Last week I attended a talk by Phil Bradley at the Cilip in London AGM (a podcast of this talk Around the World on a Library Degree is available). Phil pointed out Pinterest as a particularly useful and interesting site to watch. I had not heard of this before so registered an account. Shortly after I noticed the Pinterest implementation at Darien Library.

Pinterest is a social networking site for sharing photos. Users organise items of media on boards – typically thematically or for a particular event.

I was immediately struck by the appearance of a full pinboard, it made me think of Aby Warburg’s Mnemosyne-Atlas. The Mnemosyne-Atlas was Warburg’s unfinished work, a series of plates (or boards) showing images from the classical period to Warburg’s present time. Alongside classical and renaissance images it included photographs, maps, woodcuts, advertisements, fragments of text, posters, and so on – all kinds of visual media. Warburg intended the boards to be accompanied by commentaries, but these were incomplete on his death in 1929 and only fragments exist.

Taken as a whole it is a summary of all of Warburg’s various interests. It has been compared with avant-garde photo montages in form but is something more, perhaps even a “visual archive of European cultural history” (Rampley, 1999). A photograph from an exhibition of Mnemosyne-Atlas plates is shown above. This is from a set on Flickr called aby warburg – the mnemosyne atlas.

Without expecting every user to be a scholar and cultural theorist of Warburg’s stature, I think there is value in supporting linking our catalogue records to Pinterest as it will allow users to relate them to other images and construct different meanings from them.  I feel it’s especially appropriate for Senate House Libraries which includes the library of the The Warburg Institute.

What is different about Pinterest is it makes creation of ‘vision boards’ easy – many sites now support pinning an image to Pinterest, and there are smartphone apps allowing you to pin anything you can photograph.

How to do this in Encore

At Senate House Libraries we have testing a beta version of the next release of our next-generation catalogue (or discovery interface), Encore. Caution! Everything described below links to a beta version of our catalogue that is not yet finished.

Adding a “Pin It” button is made possible by the ability to insert your own Javascript on the bibliographic record display of the new version of the catalogue. To be able to pin a catalogue record to a Pinterest board at minimum we need an image and a link to associate with it; a description of the image is optional. In this case the image is of the book jacket.

Here’s the Javascript to accomplish this, mind any line wrapping and WordPress oddness if you copy and paste it.

<script src="//s7.addthis.com/js/250/addthis_widget.js" type="text/javascript"></script>
<script type="text/javascript">
(function() {
var azImageDiv = document.getElementById("imageAnyComponent_0");
if (azImageDiv) {
if (azImageDiv.width>1 && azImageDiv.height>1) {
// key is a variable Encore uses for checking Google Books. It contains 'ISBN:' plus an ISBN10.
var azAsin = key.substring(5);
var pinterestDiv=document.createElement('div');
pinterestDiv.innerHTML = '<span class="bibInfoHeader">Pinterest</span><div class="addthis_toolbox addthis_default_style" ><p>' + '<a class="addthis_button_pinterest" pi:pinit:url="https://encore.ulrls.lon.ac.uk/iii/encore42/record/C__R' + recordid + '" pi:pinit:media="' + 'http://images-eu.amazon.com/images/P/' + azAsin + '.01._SCLZZZZZZZ_.jpg"' + ' pi:pinit:layout="horizontal"</a></div>';
document.getElementById("customBottom").appendChild(pinterestDiv);
}
}
})();
</script>

Commentary

The challenge is to ensure we only render the Pin It button when we’re confident we have a book jacket image.

First step is to get the imageAnyComponent_0 div and check the size. This div contains the jacket image on Encore and is put there by the catalogue. Amazon returns a 1×1 pixel GIF if it has no jacket to offer, so if the image is larger than this it is probably a jacket image. Having the image is key: if we don’t have it we render nothing.

Assuming we have a jacket image I use the Add This to insert a Pinterest button which will pin a larger version of the jacket image and a link to the catalogue. Add This makes it very easy to deal with various social media buttons with minimal effort, plus it includes analytics information allowing us to judge use of these services on the catalogue. I recommend it.

Getting the ISBN turned out to be easy as the vendor’s Javascript for checking for Google Books previews already declares a variable key containing ‘ISBN:’ plus the ISBN-10 of the book.

Result

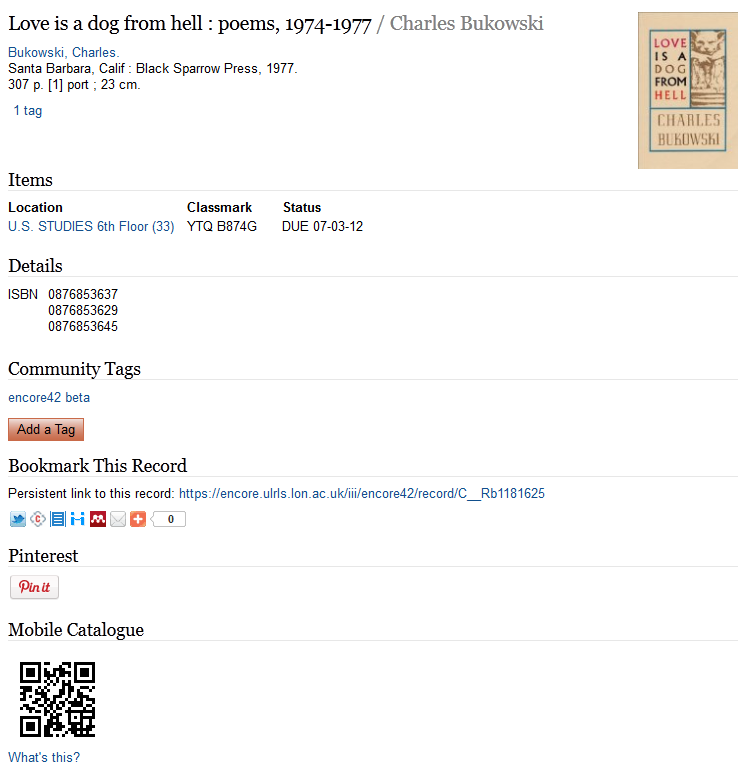
Here is how the the Pin It button appears in Encore:

If you use the Pin It button, it results in the creation of a pin like this, which can be found on my (testing!) board Catalog records from@SenateHouseLib:

Problems

I think this is a satisfactory start: comments, improvements and criticism welcome (but especially improvements).

First problem is Add This doesn’t seem to support passing a description for the pinned item. To make sharing as “frictionless” as possible I wanted to the add part of the page title as a description, for example: Senate House Libraries — Love is a dog from hell : poems, 1974-1977 / Charles Bukowski would be fine, and the Pinterest user can edit this during pinning. I added this manually to my pin above. Based on the syntax for the other options above it should be: pi:pinit:description=”description” but that doesn’t work.

Second problem is Amazon images doesn’t support ISBN-13, only ISBN-10. However the Encore catalogue will use the first ISBN that appears in the catalogue record which might be an ISBN-13. Converting from ISBN-13 to ISBN-10 is not a complete solution as although you could pin the item, you won’t see the jacket image in the catalogue in the first place.

Photo credit

Mnemosyne-Atlas boards photographed by Flirck user dzsil, license CC BY-SA.

References

Rampley, M. (1999). ‘Archives of memory: Walter Benjamin’s Arcades project and Aby Warburg’s Mnemosyne Atlas’, in Coles, A. (ed.) The optic of Walter Benjamin. London: Black Dog, pp. 94-119.